Roof Anode Disassembly / Reassembly
Product Support and Customer Service
For Further support visit our Contact Page
Safety
Think and act in a safe manner. Always disconnect power and use a lockout before you work on the E-coat system, or any of the related subsystems. Observe any confined space conditions. Use the appropriate safety equipment and clothing for the task. Please carefully read all the instructions listed below to familiarize yourself with the project before attempting to perform any of the work.
Required Materials
- None
Required Tools
- Wrenches (15/16” and 1/2”)
- Torque Wrench
Note: Make sure all power is turned off to the ME Cells.
Disassembly
Step 1
Remove one leg at a time by loosening the four 5/8” bolts. After the first leg has been removed, the bulkhead tab will still be connected to the electrode. To free the electrode, it will have to be disconnected.
Step 2
Pull out the electrode and inspect both the electrode and the ME Shell.
Reassembly
Step 3
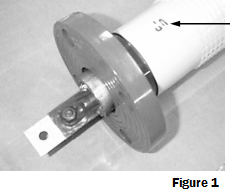
Place the new electrode into the ME Shell. Make sure the word “UP” is pointed up (See figure 1). This will keep the seam of the electrode and ME Shell pointed up.
Step 4
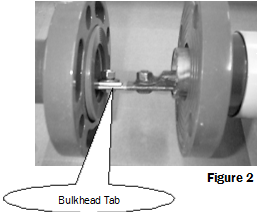
Starting with the bulkhead end, replace one leg at a time. Connect the bulkhead to the end of the electrode with two holes. Insert the electrode into the ME Shell as far as you can. (see figure 2) Make sure the gasket is in the middle of the flanges. Tighten the four 5/8” bolts. (Tighten to 25 ft. pounds.)
Step 5
For the other end, make sure that the gasket is in the middle of the two flanges, then tighten the bolts.
BULLETIN 993155