Removing Sludge from TECTRONTM Membrane Shells
Product Support and Customer Service
For Further support visit our Contact Page
Safety
Think and act in a safe manner. Always disconnect power and use a lockout before you work on the E-coat system, or any of the related subsystems. Observe any confined space conditions. Use the appropriate safety equipment and clothing for the task. Please carefully read all the instructions listed below to familiarize yourself with the project before attempting to perform any of the work.
Required Materials
- None
Required Tools
- Wet/Dry Vacuum with long suction
- DI water line
- Flashlight
General
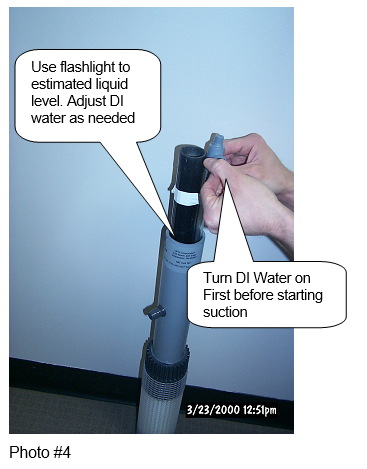
Since most all Electrodes (316L and Precious metal types) are sacrificial, they will erode over time. If this erosion occurs over a very short period of time, then it is called corrosion. In this later condition, it is common for a metal sludge to form in the bottom of the Membrane Shell. This creates a problem when a new Electrode is installed. First, it may be difficult to remove the corroded Electrode and, secondly, the new Electrode may not seat fully into the Membrane Shell. One method to remove the sludge is by using a vacuum, but with an added twist. If the liquid is sucked out of the Membrane Shell, then the Shell will collapse. To avoid this condition, DI water must be added (at the same point as the suction is located) into the Shell to replace the liquid/sludge that is removed by the vacuum. Attach a DI water line to the suction of the wet/dry vacuum. Use a small 9.53 mm (3/8”) ID flexible PVC tubing taped to the suction of the wet/dry vacuum. The combined diameter of the two can not be larger than the ID of the Neck of the TECTRON Membrane Shell (i.e. ~48 mm [1.9 in]). It may be necessary to reduce the size of the suction line of the wet/dry vacuum. (See Photo #1) If you are using open top Cells, then it’s generally not necessary to remove the Shell in order to remove the sludge.
- Disconnect power and observe all safety rules in force in the plant.
- Disconnect the Electrical Cable and the anolyte Supply Tubing.
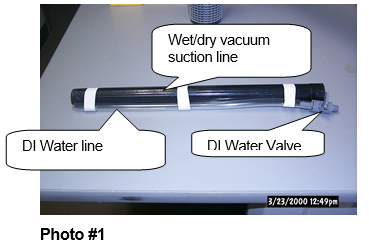
- Remove the Electrode from the Membrane Shell. If you have a Low Profile Cell, then first remove the entire Cell and disassemble (see Bulletin #990133). See Photo #2.
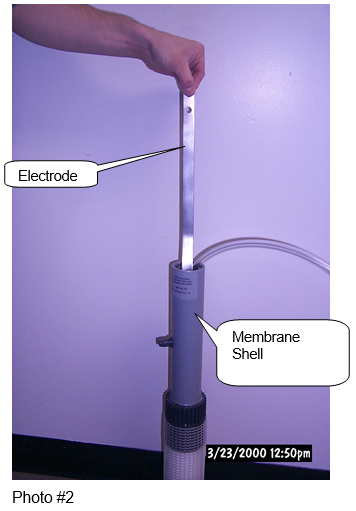
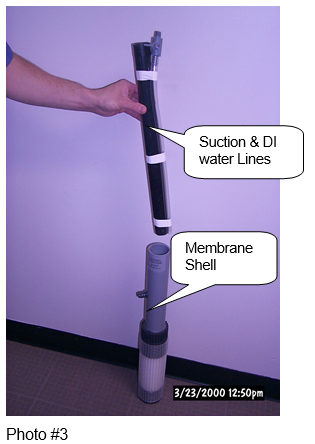
- Insert the vacuum and DI water line into the to Membrane Shell. Open the DI water line first and then turn on the vacuum second. Use a flashlight to check on the liquid level inside the Membrane Shell. If it begins to go down too much, then increase the flow of DI water. If DI water begins to overflow the top of the Membrane Shell, then lessen the flow of DI water. See Photo #3.
- Continue for a short while until all that is being removed from the Membrane Shell is DI water.
- Install a new Electrode taking care not to drop it into the bottom of the Membrane Shell.
- Reattached the electric Cable and Supply Tubing.
BULLETIN 990143