50mm Bolt Flange
Product Support and Customer Service
For Further support visit our Contact Page
Safety
Think and act in a safe manner. Always disconnect power and use a lockout before you work on the E-coat system, or any of the related subsystems. Observe any confined space conditions. Use the appropriate safety equipment and clothing for the task. Please carefully read all the instructions listed below to familiarize yourself with the project before attempting to perform any of the work.
Required Materials
- M12 Hardware
- 5/8 Flat Washers
- Metric Gasket
- Shell with metric flange
Required Tools
- 5/8 Torque Wrench
- 5/8 Wrench
General
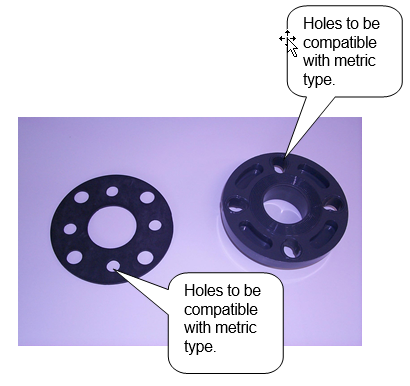
In order to fit the 50 mm bolt flange we had to modify the US flange and gasket. The US flange and gasket is now universal. Below are some photographs on how to install to the metric 50mm bolt flange.
Step 1
Metric Flange and Gasket.
Step 2
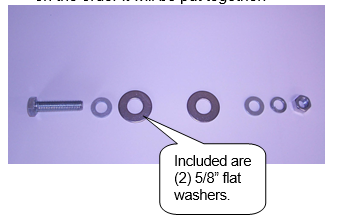
The hardware on how it is put together may be confusing. The picture will detail on the order it will be put together.
Step 3
Once ready to assemble make sure seam of shell is directed towards the floor. Begin to put together the manifold gasket and flange. The flange will be glued onto shell so it will not be loose. Be sure that the gasket is properly seated or it will leak.
Step 4
As shown in the hardware picture we included two extra flat washers. We included these because we believe that it would spread the torque force evenly around metric flange.
Step 5
When ready to tighten the flanges together torque to only 25-30 FT Pounds. By tightening too much may cause the PVC to crack or be overly stressed.
BULLETIN 993168